

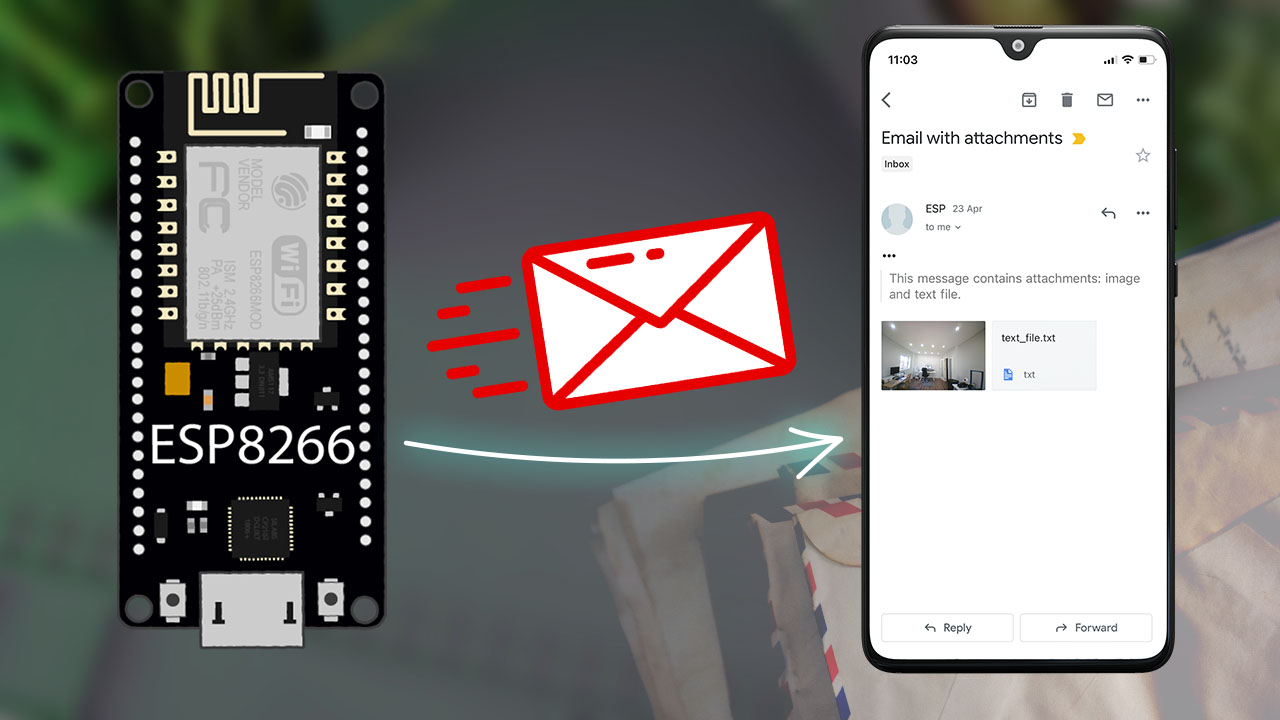
在本教程中,您将学习如何使用 SMTP 服务器通过 ESP8266 NodeMCU 板发送电子邮件。我们将展示如何发送包含原始文本、HTML 文本的电子邮件,以及如何发送图像和文件 (.txt) 等附件。我们将使用 Arduino 内核对 ESP8266 NodeMCU 板进行编程。
SMTP 服务器简介
SMTP 是指简单邮件传输协议,它是电子邮件传输的互联网标准。要使用ESP8266发送电子邮件,您需要将其连接到 SMTP 服务器。
ESP-Mail-Client 库
要使用 ESP8266 NodeMCU 开发板发送电子邮件,我们将使用 ESP-Mail-Client 库。该库允许ESP8266通过 SMTP 和 IMAP 服务器发送和接收带或不带附件的电子邮件。
在本教程中,我们将使用 SMTP 发送带附件和不带附件的电子邮件。例如,我们将发送图像 (.png) 和文本 (.txt) 文件。通过电子邮件发送的文件可以保存在 ESP8266 文件系统(SPIFFS 或 LittleFS)或 microSD 卡(本教程未介绍)中。
安装 ESP-Mail-Client 库
在继续本教程之前,您需要安装 ESP-Mail-Client 库:
发件人电子邮件(新帐户)
我们建议您创建一个新的电子邮件帐户,以将电子邮件发送到您的主要个人电子邮件地址。不要使用您的主要个人电子邮件通过ESP8266发送电子邮件。如果您的代码出现问题,或者您错误地发出了太多请求,您可能会被禁止或暂时禁用您的帐户。
我们将使用新创建的 Gmail.com 帐户发送电子邮件,但您可以使用任何其他电子邮件提供商。收件人电子邮件可以是您的个人电子邮件,没有任何问题。
创建发件人电子邮件帐户
创建一个新的电子邮件帐户,用于ESP8266发送电子邮件。可以选择使用QQ或163邮箱等国内的邮箱。
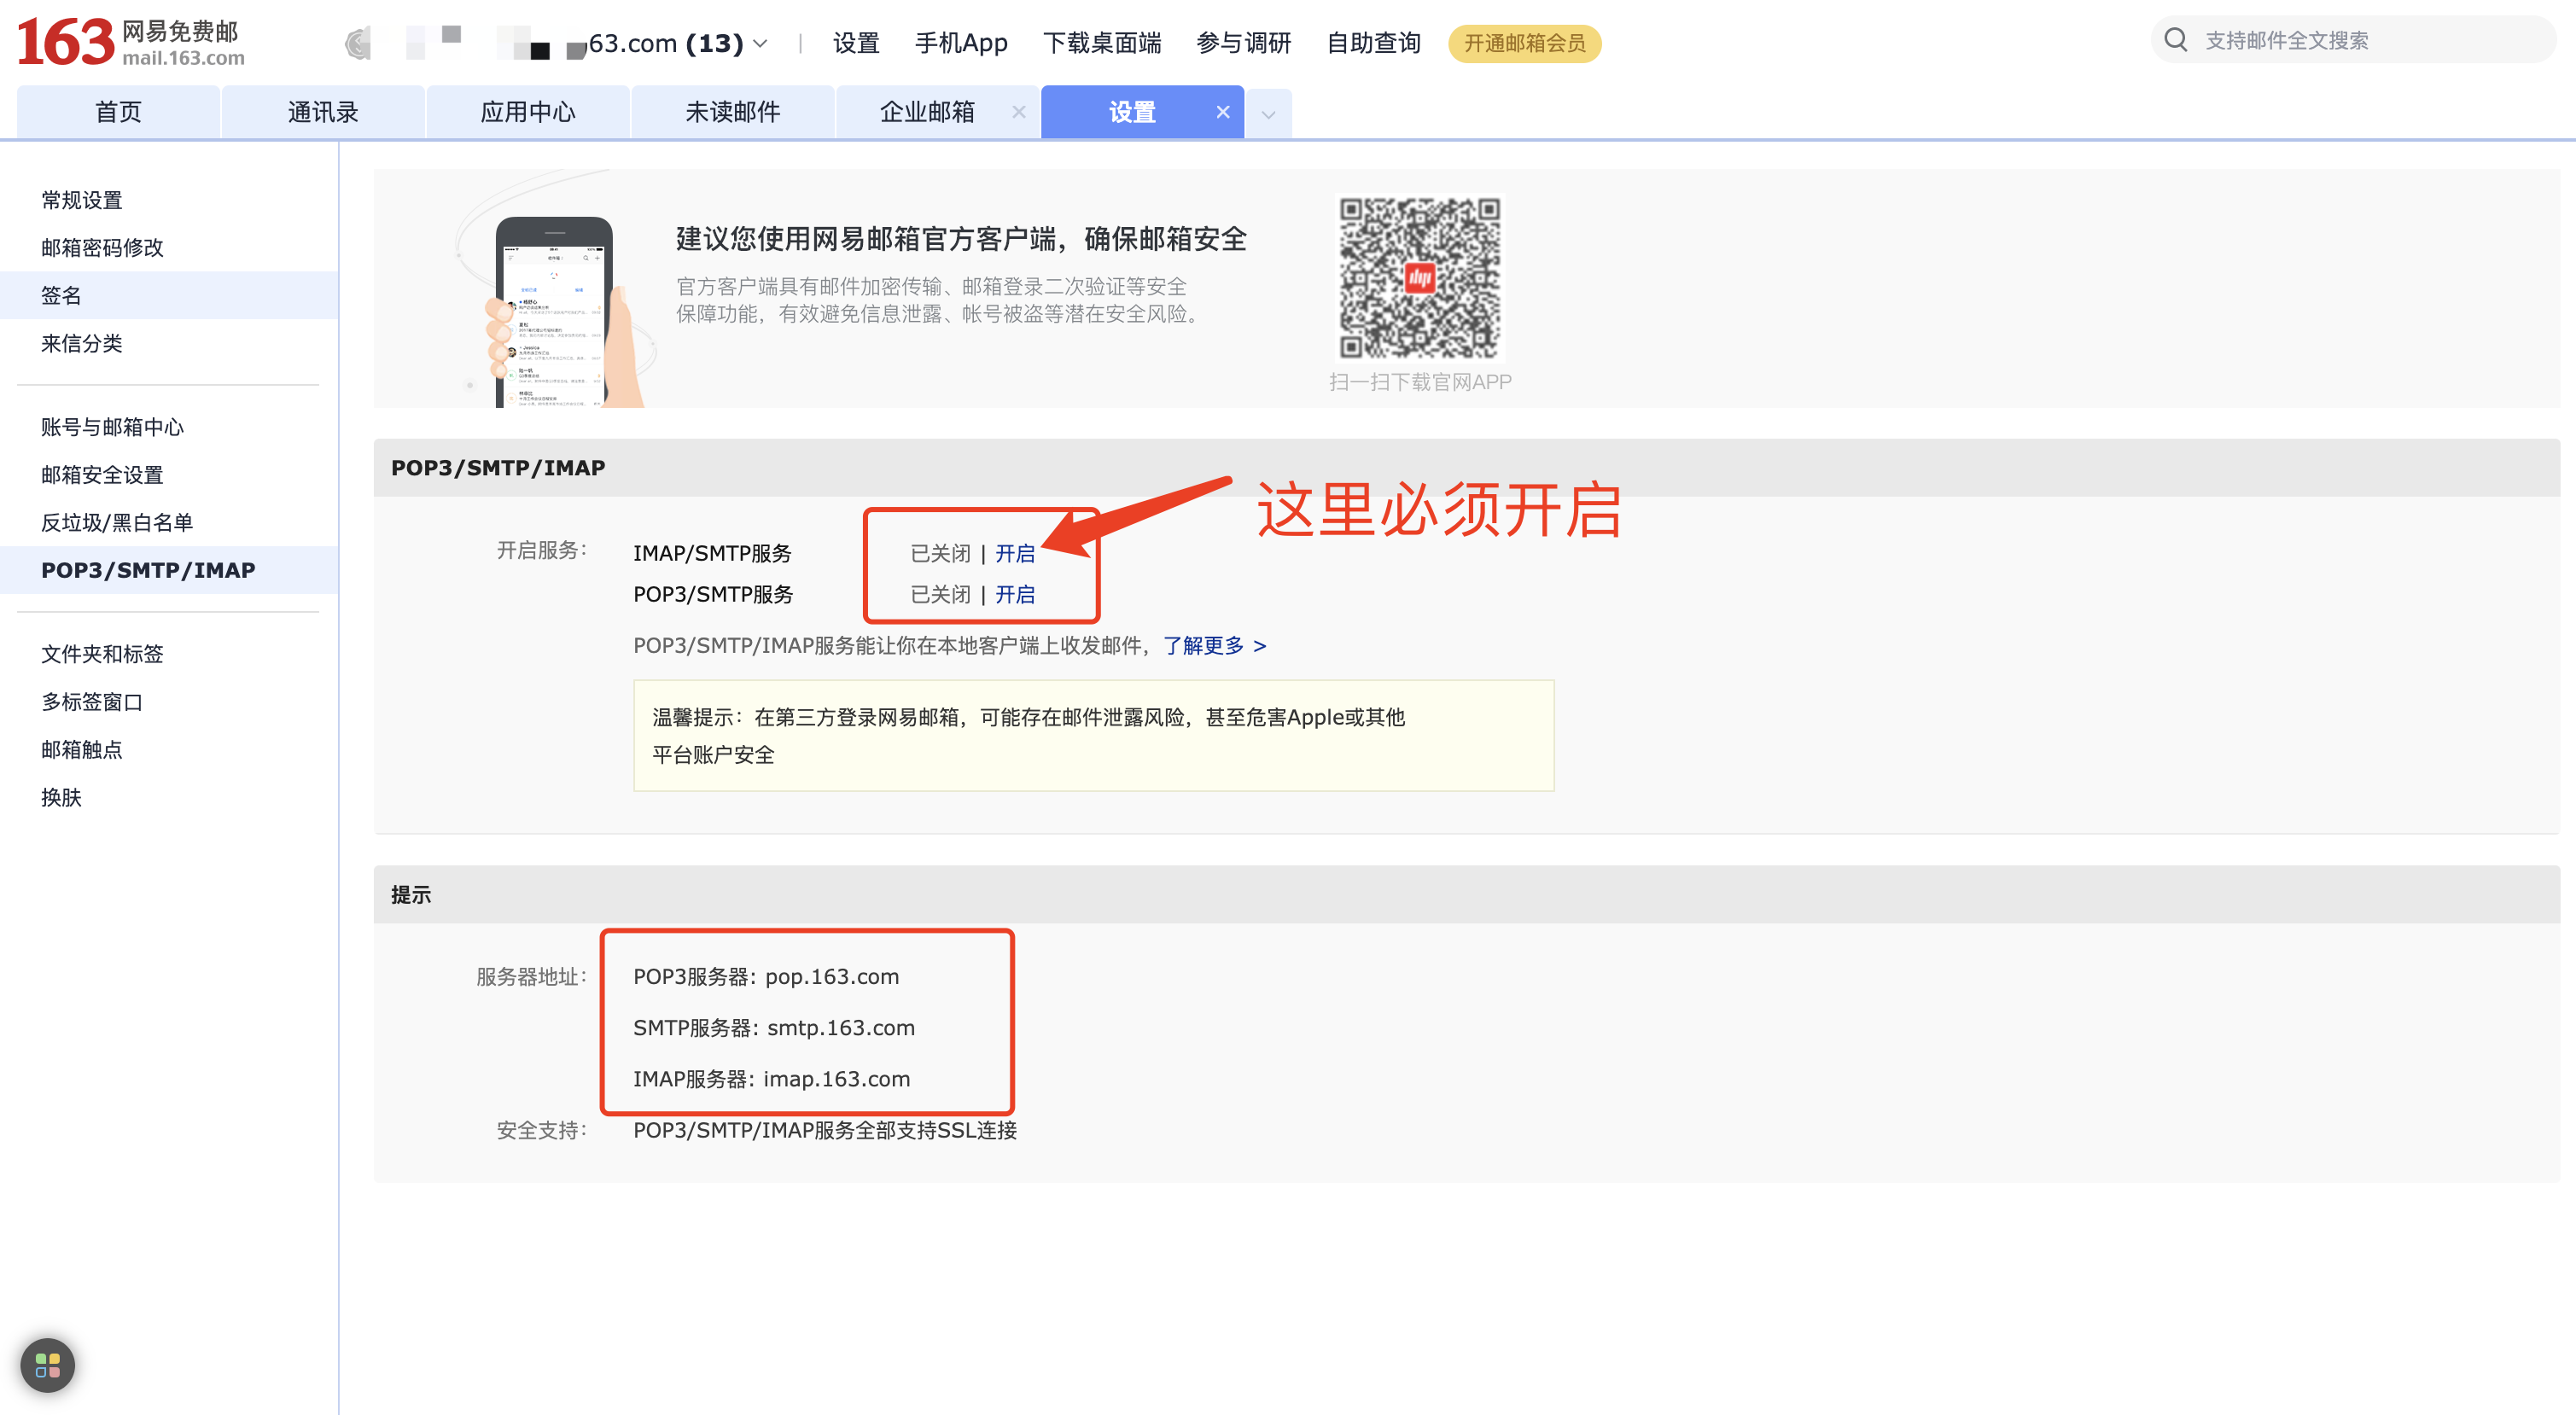
对于163邮箱,需要在163邮箱的设置中开启“POP3/SMTP服务”并获取授权码,而不是使用常规密码。对于QQ邮箱,也需要开启相应的服务并获取授权码。
当使用国内常用的邮箱发送电子邮件时,您需要了解各个邮箱提供商的SMTP服务器设置。以下是一些其他国内常见邮箱的SMTP服务器设置:
- 网易(163)邮箱:
- SMTP服务器:smtp.163.com
- 端口:25
- 需要SMTP TLS/SSL:是
- 腾讯(QQ)邮箱:
- SMTP服务器:smtp.qq.com
- 端口:465
- 需要SMTP TLS/SSL:是
- 新浪邮箱:
- SMTP服务器:smtp.sina.com
- 端口:25
- 需要SMTP TLS/SSL:是
- 搜狐邮箱:
- SMTP服务器:smtp.sohu.com
- 端口:25
- 需要SMTP TLS/SSL:是
请在Arduino代码中使用相应的SMTP服务器设置和端口,并确保开启了相应邮箱的SMTP服务。对于每个邮箱,记得使用授权码或应用程序专用密码而不是常规密码,以提高安全性。
如果您使用的是其他电子邮件提供商,则需要搜索其 SMTP 服务器设置。现在,您已经准备好开始使用ESP8266发送电子邮件了。
在 Arduino IDE 中,您可以转到 ESP-Mail-Client > 文件>示例,并尝试使用提供的示例,您需要插入您的电子邮件详细信息(发件人和收件人帐户)、SMTP 服务器设置以及您的 SSID 和密码。
发送带有 HTML 的电子邮件或使用 ESP8266 发送原始文本
以下代码通过 SMTP 服务器发送带有 HTML 或原始文本的电子邮件。例如,ESP8266在启动时发送一次电子邮件。然后,您应该能够修改代码并将其集成到您自己的项目中。
先不要上传代码,您需要进行一些修改才能使其适合您。
您需要插入网络凭据并设置发件人电子邮件、SMTP 服务器详细信息、收件人和邮件。
代码的工作原理
此代码改编自库提供的示例。该示例注释得很好,以便您了解每行代码的作用。让我们看一下您需要或可能需要更改的相关部分。
首先,在以下行中插入您的网络凭据:
#define WIFI_SSID "REPLACE_WITH_YOUR_SSID"
#define WIFI_PASSWORD "REPLACE_WITH_YOUR_PASSWORD"
插入 SMTP 服务器设置。如果您使用 163邮箱 帐户发送电子邮件,则设置如下:
#define SMTP_HOST "smtp.163.com"
#define SMTP_PORT 25
插入发件人电子邮件登录凭据(之前创建的完整电子邮件和 APP 密码)
#define AUTHOR_EMAIL "YOUR_EMAIL@XXXX.com"
#define AUTHOR_PASSWORD "YOUR_EMAIL_PASS"
插入收件人电子邮件:
#define RECIPIENT_EMAIL "RECIPIENTE_EMAIL@XXXX.com"您可能需要根据您所在的位置调整gmt_offset变量,以便电子邮件的时间戳正确。
config.time.ntp_server = F("pool.ntp.org,time.nist.gov");
config.time.gmt_offset = 8;  // 中国标准时间偏移为UTC+8
config.time.day_light_offset = 0;
在 setup() 的以下行中设置邮件标题 – 发件人姓名、发件人电子邮件、电子邮件主题以及收件人姓名和电子邮件:
/* Set the message headers */
message.sender.name = "ESP";
message.sender.email = AUTHOR_EMAIL;
message.subject = "ESP Test Email";
message.addRecipient("Sara", RECIPIENT_EMAIL);
在以下行中,在 textMsg 变量中设置消息的内容(原始文本):
//Send raw text message
String textMsg = "Hello World! - Sent from ESP board";
message.text.content = textMsg.c_str();
message.text.charSet = "us-ascii";
message.text.transfer_encoding = Content_Transfer_Encoding::enc_7bit;
如果要改为发送 HTML 文本,请取消注释以下行 – 您应该在 htmlMsg 变量中插入 HTML 文本。
/*Send HTML message*/
/*String htmlMsg = "<div style="color:#2f4468;"><h1>Hello World!</h1><p>- Sent from ESP board</p></div>";
message.html.content = htmlMsg.c_str();
message.html.content = htmlMsg.c_str();
message.text.charSet = "us-ascii";
message.html.transfer_encoding = Content_Transfer_Encoding::enc_7bit;*/
最后,以下行发送消息:
if (!MailClient.sendMail(&smtp, &message))
    Serial.println("Error sending Email, " + smtp.errorReason());
示范
将代码上传到您的ESP8266。上传后,以 115200 的波特率打开串行监视器。
如果一切按预期进行,您应该会在串行监视器中收到类似的消息。
检查您的电子邮件帐户。您应该已经收到来自ESP8266板的电子邮件。

使用ESP8266通过电子邮件发送附件 (Arduino IDE)
本节将向您展示如何在ESP8266发送的电子邮件中发送附件。我们将向您展示如何发送 .txt 文件或图片。这对于发送包含过去几个小时或其他应用程序的传感器读数的 .txt 文件非常有用。
您应该将要发送的文件保存在 ESP8266 文件系统(SPIFFS 或 LittleFS)中。该库使用的默认文件系统是 LittleFS。您还可以发送保存在 microSD 卡上的附件,但我们不会在本教程中介绍此主题。
上传文件到 LittleFS
要通过电子邮件发送文件,您应该将它们保存在 ESP8266 文件系统中。该库默认使用 LittleFS。要使用 Arduino IDE 将文件上传到 LittleFS,您需要安装文件系统上传插件。阅读以下教程,了解如何安装文件并将其上传到 ESP8266 文件系统:
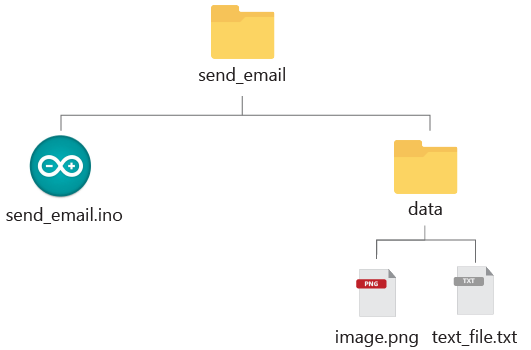
创建一个新的Arduino程序并保存它。转到“程序”>“显示程序”文件夹。在 Arduino sketch 文件夹中,创建一个名为 data 的文件夹。将 .png 文件和 .txt 文件移动到数据文件夹。
或者,您可以单击此处下载项目文件夹。
注意:使用默认代码时,您的文件必须命名为 image.png 和 text_file.txt,或者您可以修改代码以导入具有不同名称的文件。
我们将发送以下文件:
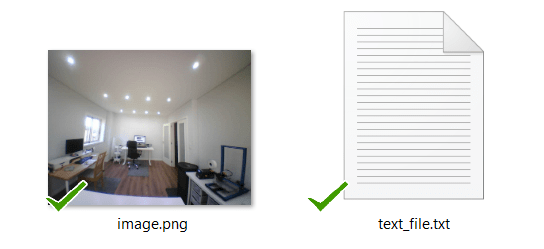
您的文件夹结构应如下所示(下载项目文件夹):
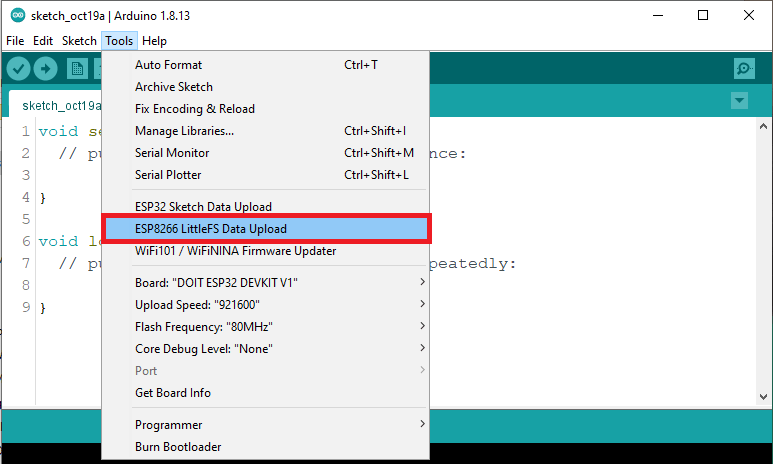
将文件移动到数据文件夹后,在 Arduino IDE 中,转到 LittleFS 数据上传> ESP8266工具,然后等待文件上传。
您应该会在调试窗口中收到一条成功消息。如果文件已成功上传,请转到下一部分。

使用方法
以下代码发送一封电子邮件,其中包含 .txt 文件和附加的图片。在上传验证码之前,请确保插入发件人电子邮件设置以及收件人电子邮件。
/*

  更多Arduino/ESP8266/ESP32等教程请访问:https://www.qutaojiao.com
*/
// To use send Email for Gmail to port 465 (SSL), less secure app option should be enabled. https://myaccount.google.com/lesssecureapps?pli=1

#include <Arduino.h>
#if defined(ESP32)
  #include <WiFi.h>
#elif defined(ESP8266)
  #include <ESP8266WiFi.h>
#endif
#include <ESP_Mail_Client.h>

#define WIFI_SSID "REPLACE_WITH_YOUR_SSID"
#define WIFI_PASSWORD "REPLACE_WITH_YOUR_PASSWORD"

#define SMTP_HOST "smtp.163.com"

/** The smtp port e.g.
 * 25  or esp_mail_smtp_port_25
 * 465 or esp_mail_smtp_port_465
 * 587 or esp_mail_smtp_port_587
*/
#define SMTP_PORT 25

/* The sign in credentials */
#define AUTHOR_EMAIL "YOUR_EMAIL@XXXX.com"
#define AUTHOR_PASSWORD "YOUR_EMAIL_APP_PASS"

/* Recipient's email*/
#define RECIPIENT_EMAIL "RECIPIENTE_EMAIL@XXXX.com"

/* The SMTP Session object used for Email sending */
SMTPSession smtp;

/* Callback function to get the Email sending status */
void smtpCallback(SMTP_Status status);

void setup(){
  Serial.begin(115200);
  Serial.println();
  Serial.print("Connecting to AP");
  WiFi.begin(WIFI_SSID, WIFI_PASSWORD);
  while (WiFi.status() != WL_CONNECTED){
    Serial.print(".");
    delay(200);
  }
  Serial.println("");
  Serial.println("WiFi connected.");
  Serial.println("IP address: ");
  Serial.println(WiFi.localIP());
  Serial.println();

  // Init filesystem
  ESP_MAIL_DEFAULT_FLASH_FS.begin();

  /** Enable the debug via Serial port
   * none debug or 0
   * basic debug or 1
  */
  smtp.debug(1);

  /* Set the callback function to get the sending results */
  smtp.callback(smtpCallback);

  /* Declare the Session_Config for user defined session credentials */
  Session_Config config;

  /* Set the session config */
  config.server.host_name = SMTP_HOST;
  config.server.port = SMTP_PORT;
  config.login.email = AUTHOR_EMAIL;
  config.login.password = AUTHOR_PASSWORD;
  config.login.user_domain = "mydomain.net";

  /*
  Set the NTP config time
  For times east of the Prime Meridian use 0-12
  For times west of the Prime Meridian add 12 to the offset.
  Ex. American/Denver GMT would be -6. 6 + 12 = 18
  See https://en.wikipedia.org/wiki/Time_zone for a list of the GMT/UTC timezone offsets
  */
  config.time.ntp_server = F("pool.ntp.org,time.nist.gov");
  config.time.gmt_offset = 3;
  config.time.day_light_offset = 0;

  /* Declare the message class */
  SMTP_Message message;

  /* Enable the chunked data transfer with pipelining for large message if server supported */
  message.enable.chunking = true;

  /* Set the message headers */
  message.sender.name = "ESP Mail";
  message.sender.email = AUTHOR_EMAIL;

  message.subject = F("Test sending Email with attachments and inline images from Flash");
  message.addRecipient(F("Sara"), RECIPIENT_EMAIL);

  /** Two alternative content versions are sending in this example e.g. plain text and html */
  String htmlMsg = "This message contains attachments: image and text file.";
  message.html.content = htmlMsg.c_str();
  message.html.charSet = "utf-8";
  message.html.transfer_encoding = Content_Transfer_Encoding::enc_qp;

  message.priority = esp_mail_smtp_priority::esp_mail_smtp_priority_normal;
  message.response.notify = esp_mail_smtp_notify_success | esp_mail_smtp_notify_failure | esp_mail_smtp_notify_delay;

  /* The attachment data item */
  SMTP_Attachment att;

  /** Set the attachment info e.g.
   * file name, MIME type, file path, file storage type,
   * transfer encoding and content encoding
  */
  att.descr.filename = "image.png";
  att.descr.mime = "image/png"; //binary data
  att.file.path = "/image.png";
  att.file.storage_type = esp_mail_file_storage_type_flash;
  att.descr.transfer_encoding = Content_Transfer_Encoding::enc_base64;

  /* Add attachment to the message */
  message.addAttachment(att);

  message.resetAttachItem(att);
  att.descr.filename = "text_file.txt";
  att.descr.mime = "text/plain";
  att.file.path = "/text_file.txt";
  att.file.storage_type = esp_mail_file_storage_type_flash;
  att.descr.transfer_encoding = Content_Transfer_Encoding::enc_base64;

  /* Add attachment to the message */
  message.addAttachment(att);

  /* Connect to server with the session config */
  if (!smtp.connect(&config)){
    ESP_MAIL_PRINTF("Connection error, Status Code: %d, Error Code: %d, Reason: %s", smtp.statusCode(), smtp.errorCode(), smtp.errorReason().c_str());
    return;
  }

  if (!smtp.isLoggedIn()){
    Serial.println("nNot yet logged in.");
  }
  else{
    if (smtp.isAuthenticated())
      Serial.println("nSuccessfully logged in.");
    else
      Serial.println("nConnected with no Auth.");
  }

  /* Start sending the Email and close the session */
  if (!MailClient.sendMail(&smtp, &message, true))
    Serial.println("Error sending Email, " + smtp.errorReason());
}

void loop(){
}

/* Callback function to get the Email sending status */
void smtpCallback(SMTP_Status status){
  /* Print the current status */
  Serial.println(status.info());

  /* Print the sending result */
  if (status.success()){
    Serial.println("----------------");
    ESP_MAIL_PRINTF("Message sent success: %dn", status.completedCount());
    ESP_MAIL_PRINTF("Message sent failled: %dn", status.failedCount());
    Serial.println("----------------n");
    struct tm dt;

    for (size_t i = 0; i < smtp.sendingResult.size(); i++){
      /* Get the result item */
      SMTP_Result result = smtp.sendingResult.getItem(i);
      time_t ts = (time_t)result.timestamp;
      localtime_r(&ts, &dt);

      ESP_MAIL_PRINTF("Message No: %dn", i + 1);
      ESP_MAIL_PRINTF("Status: %sn", result.completed ? "success" : "failed");
      ESP_MAIL_PRINTF("Date/Time: %d/%d/%d %d:%d:%dn", dt.tm_year + 1900, dt.tm_mon + 1, dt.tm_mday, dt.tm_hour, dt.tm_min, dt.tm_sec);
      ESP_MAIL_PRINTF("Recipient: %sn", result.recipients.c_str());
      ESP_MAIL_PRINTF("Subject: %sn", result.subject.c_str());
    }
    Serial.println("----------------n");

    // You need to clear sending result as the memory usage will grow up.
    smtp.sendingResult.clear();
  }
}
代码的工作原理
这段代码与上一段代码非常相似,因此我们只看一下发送附件的相关部分。
在 setup() 中,使用 ESP 邮件客户端库方法初始化文件系统。ESP32 库中设置的默认文件系统是 LittleFS(您可以在库文件 ESP_Mail_FS.h 中更改默认值)。
// Init filesystem
ESP_MAIL_DEFAULT_FLASH_FS.begin();
您需要按如下方式创建附件:
/* The attachment data item */
SMTP_Attachment att;
然后,添加附件详细信息:文件名、MIME 类型、文件路径、文件存储类型和传输编码。在以下几行中,我们将发送图像文件。
att.descr.filename = "image.png";
att.descr.mime = "image/png";
att.file.path = "/image.png";
att.file.storage_type = esp_mail_file_storage_type_flash;
att.descr.transfer_encoding = Content_Transfer_Encoding::enc_base64;
最后,将附件添加到邮件中:
message.addAttachment(att);如果要发送更多附件,则需要在添加上一个附件后调用以下行:
message.resetAttachItem(att);然后,输入其他附件(文本文件)的详细信息:
att.descr.filename = "text_file.txt";
att.descr.mime = "text/plain";
att.file.path = "/text_file.txt";
att.file.storage_type = esp_mail_file_storage_type_flash;
att.descr.transfer_encoding = Content_Transfer_Encoding::enc_base64;
并将此附件添加到邮件中:
message.addAttachment(att);如果要发送更多附件,则需要在添加下一个附件之前调用以下行:
message.resetAttachItem(att);然后,输入其他附件(文本文件)的详细信息:
att.descr.filename = "text_file.txt";
att.descr.mime = "text/plain";
att.file.path = "/text_file.txt";
att.file.storage_type = esp_mail_file_storage_type_flash;
att.descr.transfer_encoding = Content_Transfer_Encoding::enc_base64;
并将此附件添加到邮件中:
message.addAttachment(att);最后,您只需要像在前面的示例中一样发送消息:
if (!MailClient.sendMail(&smtp, &message, true))
  Serial.println("Error sending Email, " + smtp.errorReason());
示范
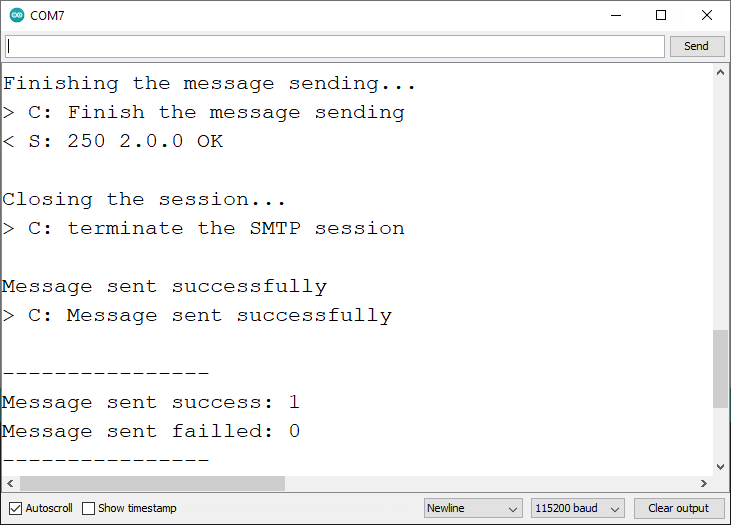
上传代码后,以 115200 的波特率打开串行监视器。如果一切按预期进行,您应该会在串行监视器上收到类似的消息。
如果您转到收件箱,您应该会收到包含两个附件的邮件。
总结
在本教程中,您学习了如何使用 SMTP 服务器通过 ESP8266 NodeMCU 板发送电子邮件。您已经学习了如何发送 HTM 文本、原始文本和附件。
现在,我们的想法是修改代码并将其包含在您自己的项目中。例如,发送包含过去一小时的传感器读数、检测到运动时的通知等的 .txt 文件可能很有用。


Smart bankroll management is key, especially with so many options now! Seeing RTP around 94-98% on platforms like kkk ph game is a good sign, but always gamble responsibly. Verification processes are crucial for security too!
Just found this secure gaming hub for PH players with instant GCash deposits. Check out philwin download apk for safe slots now! Stay vigilant and enjoy responsibly while chasing real money wins on the go today.
This deep dive into programmatic email confirms that reliable, low-power communication is key for IoT integration. Beyond simple notifications, secure SMTP handling is critical for any digital service requiring robust backend communication-whether it’s system alerts or verifying user activity, much like ensuring a smooth experience on a platform like jl96 app casino. Excellent work detailing the necessary security protocols!
That’s a fascinating take on longshot strategies! Understanding game mechanics, like spin ph com com emphasizes, is key to informed betting. Skill & knowledge really do make a difference! 🤔