这篇文章展示了如何在Arduino上使用倾斜传感器模块。倾斜传感器多次被称为倾角仪、倾斜开关或滚球传感器。使用倾斜传感器是检测方向或倾斜度的简单方法。
倾斜传感器模块简介
倾斜传感器模块如下图所示。
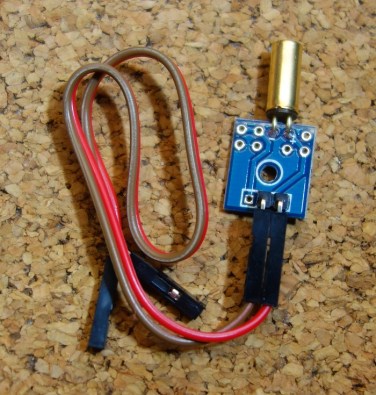
倾斜传感器可以检测方向或倾斜度。它检测传感器是完全直立还是倾斜。
这使得它非常有用,例如,用于玩具、机器人和其他工作方法取决于倾斜度的电器。
它是如何工作的?
倾斜传感器是圆柱形的,内部包含一个自由导电滚动球,下面有两个导电元件(极)。
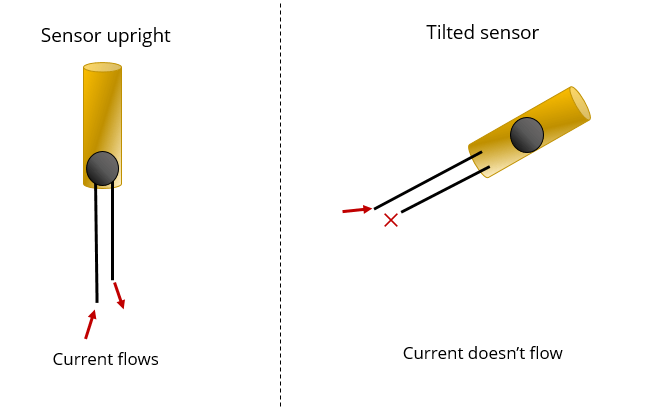
其工作原理如下:
- 当传感器完全直立时,球落到传感器底部并连接两极,使电流流动。
- 当传感器倾斜时,球不会接触磁极,电路断开,电流不会流动。
这样,倾斜传感器就像一个开关,根据其倾斜度打开或关闭。因此,它将向Arduino提供数字信息,无论是高信号还是低信号。
引脚接线
将倾斜传感器连接到Arduino非常简单。您只需要将一个引脚连接到Arduino数字引脚,将GND连接到GND。
如果像这样连接传感器,则需要激活传感器所连接的数字引脚的 arduino 内部上拉电阻器。否则,您应该在电路中使用 10kOhm 上拉电阻器。
示例:倾斜敏感 LED
这只是一个简单的例子,让你开始把手放在你的倾斜传感器上。
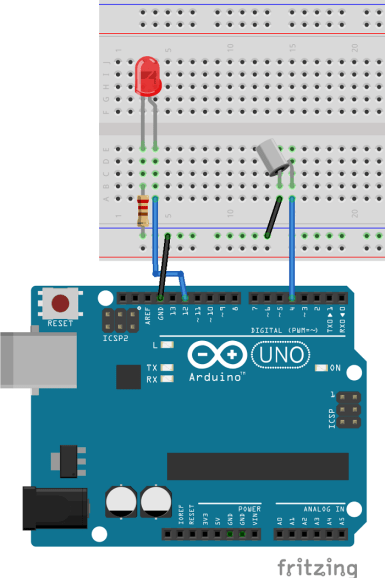
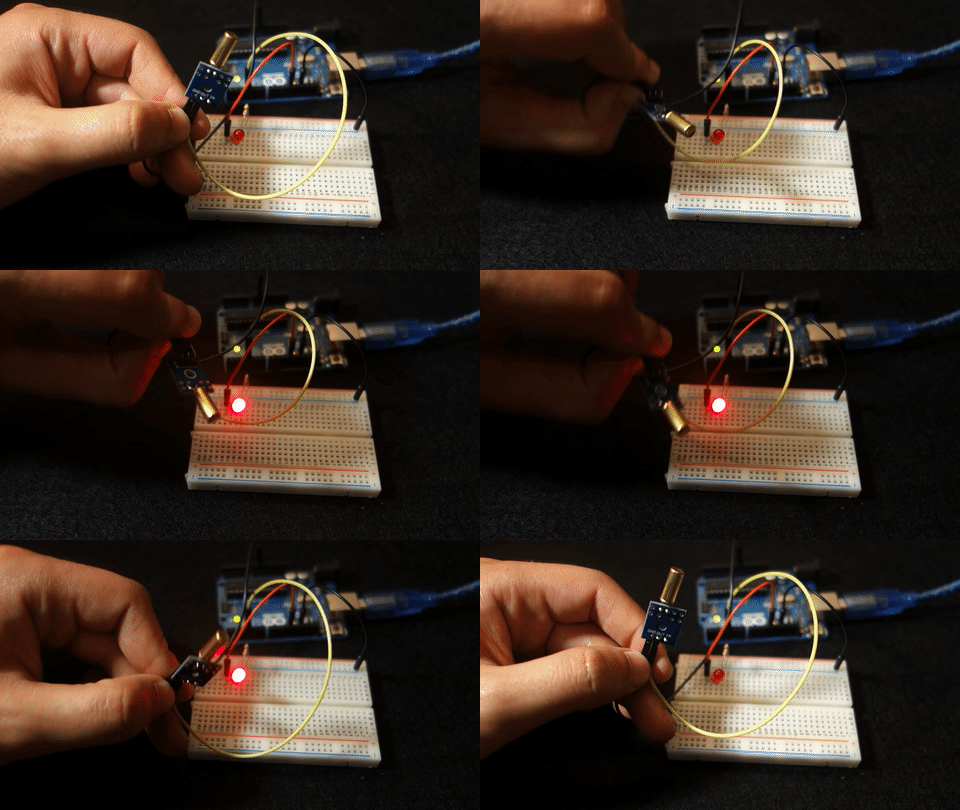
在此示例中,如果传感器直立,LED 将关闭,如果传感器倾斜,LED 将打开。
所需零件
- Arduino UNO – 阅读最佳 Arduino 入门套件
- 1x 面包板
- 1x 倾斜传感器
- 1 个 LED
- 1x 220欧姆电阻
- 跳线
连线图
在本例中,您只需在“引脚接线”部分的原理图中添加一个LED。
程序
要完成此示例,请将以下代码上传到Arduino板。
int ledPin = 12;
int sensorPin = 4;
int sensorValue;
int lastTiltState = HIGH;   // the previous reading from the tilt sensor

// the following variables are long's because the time, measured in miliseconds,
// will quickly become a bigger number than can be stored in an int.
long lastDebounceTime = 0;  // the last time the output pin was toggled
long debounceDelay = 50;    // the debounce time; increase if the output flickers

void setup(){
  pinMode(sensorPin, INPUT);
  digitalWrite(sensorPin, HIGH);
  pinMode(ledPin, OUTPUT);
  Serial.begin(9600);
}

void loop(){
  sensorValue = digitalRead(sensorPin);
  // If the switch changed, due to noise or pressing:
  if (sensorValue == lastTiltState) {
    // reset the debouncing timer
    lastDebounceTime = millis();
  }
  if ((millis() - lastDebounceTime) > debounceDelay) {
    // whatever the reading is at, it's been there for longer
    // than the debounce delay, so take it as the actual current state:
    lastTiltState = sensorValue;
  }
  digitalWrite(ledPin, lastTiltState);

  Serial.println(sensorValue);
  delay(500);
}
示范
最后,这就是你将拥有的。
结束语
我希望你觉得这篇文章有用。

